
I have a child in my house
who loves Harry Potter more than any child imaginable
We have these:

And this:


And are going here:

We have not just one but TWO hardback sets of this:

How old is this child you ask?
9? 10? 11?
Nope
He's 26.
And yes,
I married him.
I married him.
So this is dedicated to him. The one who wishes Hogwarts was real...
but also secretly thinks it is.
The Harry Potter Wand Tutorial
 Difficulty: Super Easy
Time: 30 minutes
Cost: Free dollars and Free cents
Fun-ness: It's off the charts!
Materials
 Computer Paper
Tape
Glue Stick
Tissue Paper (to stuff in wand)
Glue Gun
Brown/Gold Paints
Paintbrush


Time: 30 minutes
Cost: Free dollars and Free cents
Fun-ness: It's off the charts!
Materials

Tape
Glue Stick
Tissue Paper (to stuff in wand)
Glue Gun
Brown/Gold Paints
Paintbrush
Directions
Step One: Rolling Your Wand
Roll a piece of tape, and place it diagonally from corner to corner on your paper. Using the opposite corner, roll the paper tightly towards the tape until you get to the end of your paper. Then glue!


Step 2: Creating the Ends
Cut off pointed ends of the paper. Push some tissue paper completely into the hollowed inside of the "wand". Using the hot glue, seal the opening shut by making a rounded...blob. The color you choose will show through, even when you seal it with hot glue. Do this to the other side as well.


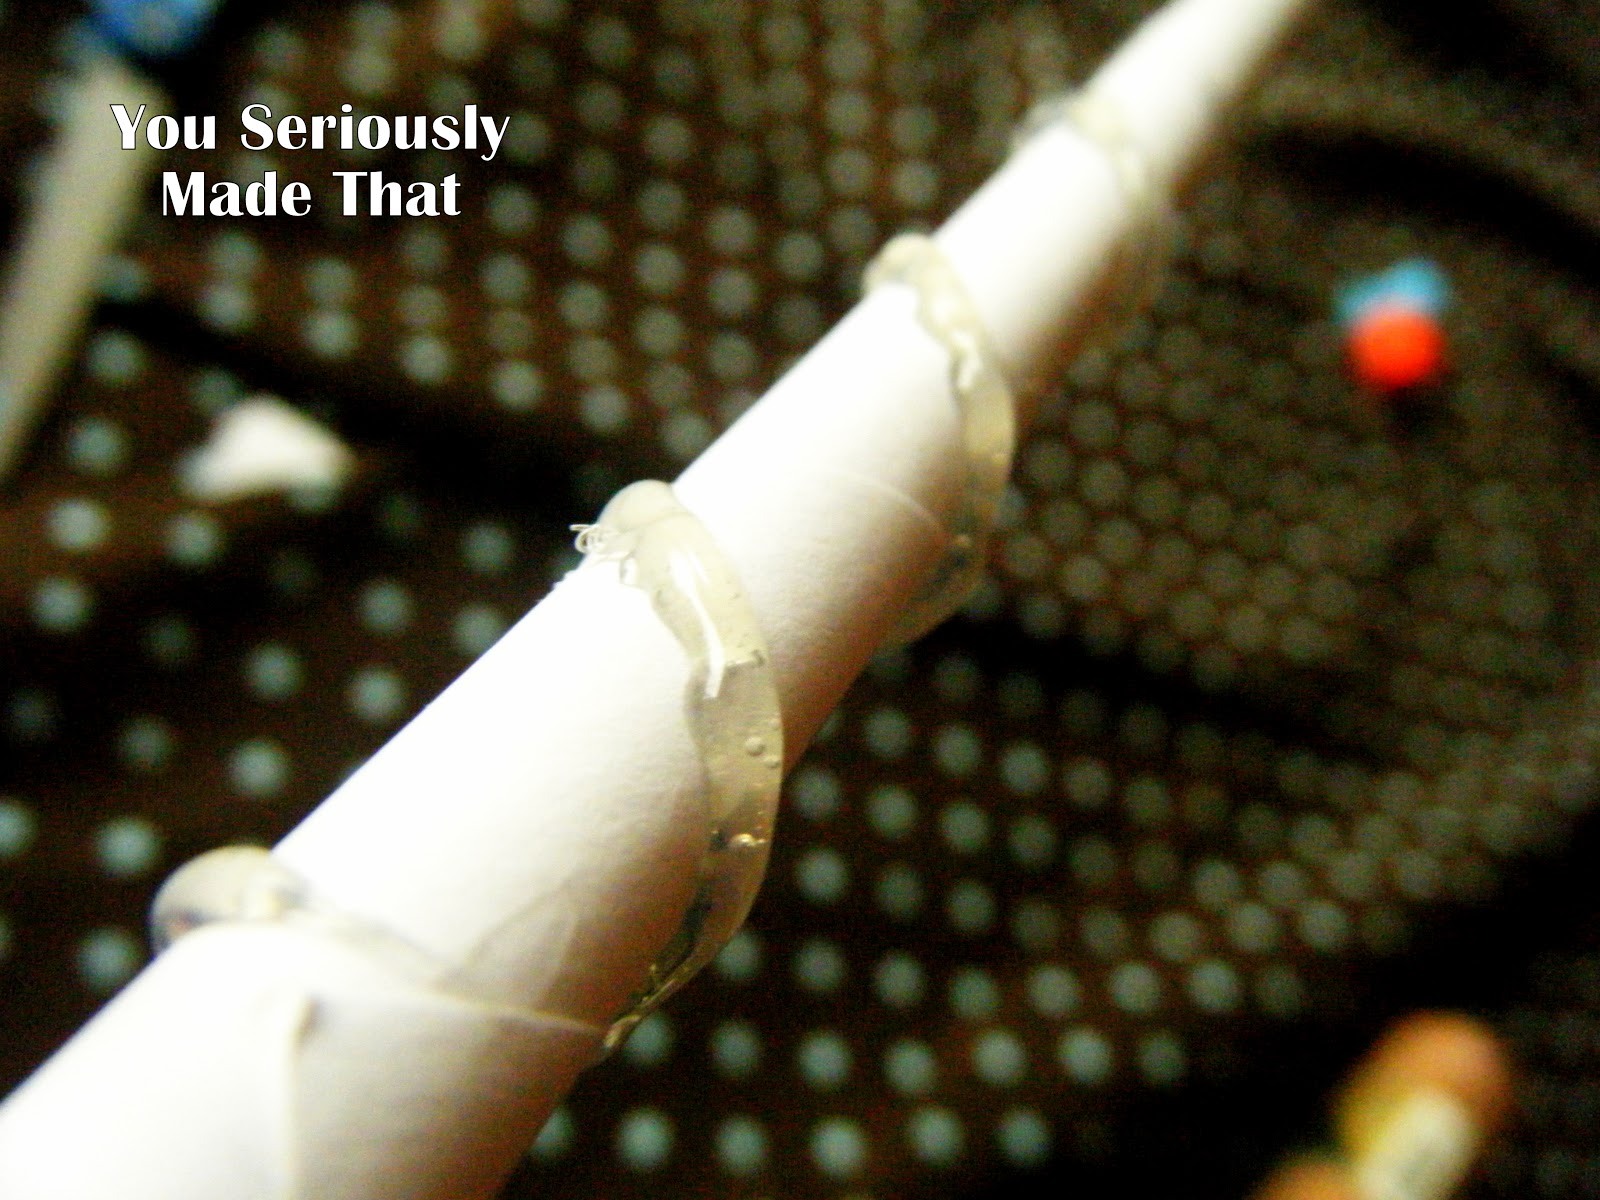
Step 3: Hot Glue Designs
Okay, honestly, I didn't take any pictures of me DOING the step, because I only have 2 hands, and one had to be holding the wand, and one had to be holding the glue gun. That's just how the cookies crumbled. BUT this step is pretty easy. Just grab your glue gun, and start squeezing. It's like decorating a cake...but hotter.

Step 4: Painting
Grab your paint sets and cover this baby. Once you finish the brown, embellish with some gold paint. It looks best if you paint the bumps pretty good, and then lightly brush the rest of it. Don't forget to let it dry (I know, I know, you want to play with it...but you gotta wait!)


And that's it!
Check out this bad boy!

I am SUCH a good wife...sometimes.
Check out this bad boy!

I am SUCH a good wife...sometimes.

24 comments:
I'm a big Harry Potter fan. Your wand is really a clever idea. Now I'm your newest follower.
http://moogieland.blogspot.com/
I love this!
We have two sets too! ....only they are both mine. I love this idea, this is on my to do list!
I am CRACKING UP. As I read the beginning, I assumed you were talking about a kid... and thought the whole time "wow, this is something Dustin would love"... he is my almost 31 year old husband! haha
Thnks so much for Linking up with me!! This is way too cool!! LOVIN IT!!
~ Nikki
http://bestpartofbelieveis.blogspot.com/
LOL, this is great fun. Thanks for the tutorial.
You just made my day...seriously! I am in the process of planning my son's HP Birthday (he'll be 8) and I am definitely going to make these!!! Will link back to your amazing tutorial when I make them (before the end of March.) New follower and new fan ;)
Alison from http://alisonswonderscraporium.blogspot.com/
You are such a good wife. Impressed!
I wish I had that magic wand before I just did like 500 dishes...
On my project list! I too am a Potter nerd. For next Halloween we are making it a Potter family affair. I will be Hermione, My monster will be Malfoy, my Roly Poly a baby Harry, and I am going to convince the hubs to be Snape. Since I will be making our costumes your tutorial is a MUST!!! Thanks!!!!!!!!
Lol! You are just too funny and that Harry Potter wand is awesome!
oh this is fun. The want looks as good as ours, and we spent a fortune on them. We just took our family to The Wizarding World and it was incredible!!!
Love Love Love!!! I am going to make myself one!!!
This is really awesome, but I also love this tutorial for how to make it light up! :
http://www.youtube.com/watch?v=srgVwhRB7F4
My kids are gonna love this! I know you created this post a long time ago, but I'd still love it if you'd link it up to my linky party at OneCreativeMommy.com.
Pretty good, but, I had some trouble on step one...
It's been a few years since you made this, but the directions are just as good as when you first posted Thank you from a muggle mom in Shanghai and a very happy child! :)
Link exchange іs nothіng else howeveг it
is just placing the othеr person's blog link on your page at proper place and other person will also do similar in favor of you.
Here is my blog: garden center
my site: garden center magazine
Hi there, i read your blog from time to time and i own a similar one
and i was just curious if you get a lot of spam feedback?
If so how do you protect against it, any plugin or anything
you can advise? I get so much lately it's driving me insane so any help is very much appreciated.
Here is my web site ... architectectural Designs
My partner and I absolutely love your blog and find many of your post's to be just what I'm looking for.
Does one offer guest writers to write content available for you?
I wouldn't mind composing a post or elaborating on a lot of the subjects you write regarding here. Again, awesome site!
my homepage :: dstv installations johannesburg
Hey there! Quick question that's entirely off topic. Do you know how to make your site mobile friendly? My site looks weird when viewing from my iphone 4. I'm trying to find a theme or plugin that might be able to
correct this problem. If you have any suggestions, please share.
With thanks!
Here is my web site web site designer
Fantastic blog you have here but I was curious about if you knew
of any user discussion forums that cover the same topics talked about in this article?
I'd really love to be a part of online community where I can get feed-back from other knowledgeable individuals that share the same interest. If you have any recommendations, please let me know. Thanks!
Feel free to surf to my site ... architects Johannesburg Architectural services Johannesburg
Try using a chopstick instead of paper so that it's more permanent and sturdier. Use the hot glue for the handle and shape it once it's almost cool completely. Here's the link to the tutorial.
http://majann.deviantart.com/art/Wands-tutorial-195270444
This is very interesting, You're a very skilled blogger. I've joined your rss feed and look forward to seeking more of your great post.
Also, I have shared your website in my social networks!
Also visit my web-site :: More information
Post a Comment