Sunday, February 27, 2011

Sunday Feature


This week, I am featuring projects that show that 
I NEED POWER TOOLS
I want a table saw so badly, I called my mom to ask if I could have her's when she dies. 
Daughter of the Year award, right there

I know many of you have probably seen this on Crafting with the Stars, but I LOVE it. That is one Epic Pantry. Mandi from Tidbits from the Tremaynes made this little beauty. Can I also add that she is hilarious? You should definitely stop by.

I love this beautiful Mason Jar Storage by Liz Marie! Seeing as all my crap is thrown in random bathroom drawers/counter/floor, I definitely want one. 

And lastly the teacher in me squealed with joy at these Front Facing Bookshelves by Polly at Helping Little Hands! Uhhhh can she make me a set? Or 10? 

Somehow I don't think my downstairs neighbors will appreciate me using a table saw on our balcony...

Friday, February 25, 2011

Double Dream Hands

So my husband is on a Scouting Camp out 
They are sleeping in igloos...uhhh....no thank you.

So I made a video
a dance video
the BEST dance video ever
Based on THIS awesome video
Because I am soooooo bored. 

I hope you love it...or at least I hope you don't think I am a total nerd after watching...okay...I may be just a tad nerdy. Only a tad though.
(If you don't want to listen to my ramblings...just jump to minute 1:28 that's where the real dancing starts)
Enjoy.


Sorry about my recent (as in today...) hiatus from crafting. I'll get back to tomorrow...or maybe Monday. Just depends on my boredom levels. I really need kids...

Random Jobs of the Working Woman

The other day, I was talking to a coworker about random work experience
Please tell me that I'm not the only one here who has worked random jobs!
Oh how random?
You be the judge...

in no particular order-
Vending machine Re-stocker
Paper Delivery Girl
Activities Leader at an Alzheimer's home
Concessions Hawker
Balloon Animal Maker
ATV tour guide 
Shot Gun Instructor
Catering Staff
Housekeeping Supervisor
Summer Camp Supervisor
4th Grade Teacher
and now
YMCA Before and After School Supervisor / Professional Crafter
(I wish)


I know it's hard to picture me with a shot gun... 
Maybe that's why I like the glue gun so much!

Tell me, what is the most random jobs you've ever had?

Thursday, February 24, 2011

Rainbow Fish Luminary Tutorial

In case you missed it over on ucreatekids, here it is again, for your viewing pleasure (please...hold your applause...or don't)
The Rainbow Fish Luminary Tutorial 

Time Needed: At least an hour
Difficulty: Easy
Cost: $ 1-5 dollars

Materials Needed
Glass Gar
Blue Tissue Paper
Coffee Filter
Mod Podge
Water Color Paints/Brush
Sponge Brush
Black Permanent Marker
Scissors
Light Source

Directions
Step 1: Painting Your Filter
This is the perfect step for any child to participate in! There is no right way to decorate a filter...just get out your watercolors, and go. Just make sure you put something underneath, as the paint WILL bleed through the filter. Allow to completely dry before next step (you may want to get out your blow dryer...)


Step 2: Drawing and Cutting your Fishes
You have a couple of options on this step. When I made my fish, I just freehanded the shapes onto my colored coffee filter. You can make stencils for your child, or allow them to freehand the fish (which I think would be so cute!) Once you've drawn all of your fish, cut out, and place aside


Step 3: Mod Podge your Tissue Paper
Mod Podging tissue paper can be tricky, so this step may require a little more adult help. Cut your tissue paper into large squares (This makes it easier to work around corners, etc). Spread an even layer of Mod Podge onto the jar using your sponge brush. Once you've covered a good portion of the jar, place a tissue paper square on top. Using a good amount of Mod Podge on your brush (if your brush gets too dry, it will rip the tissue...), cover the top of the tissue paper as well. Continue this process until you've covered the entire jar. Once finished, one more coat to really seal in the tissue paper.

Step 4: Mod Podge your Fish
Because your jar should be wet, simply place all of your fish where you'd like them to go! Once you have all of the fish set in place, seal them in with a layer of Mod Podge! 


Step 5: Finishing it all off
Trim any top edges, and Mod Podge Down. After this step, let the jar dry completely. If you use a hair dryer, make sure you use a NON HEAT setting (or your Mod Podge will bubble). Once your jar is COMPLETELY dry (believe me...I've ruined many a permanent marker because of my impatience...), You can go back and trace around the fish using a permanent marker! This helps them to pop out when you put your candle inside!


And there you go! Just pop a candle inside that baby, and watch it glow!

Wednesday, February 23, 2011

Check it out!

You've got to check out this amazing blog I found the other day!

EASY
Tara is super talented, and she shares a lot of free crochet patterns.
I only wish I had her skill!

And while your at it, check out "Would You Like Yarn With That"! She has tons of awesome crocheting resources/patterns she's found all over the internet.
She's just starting her blog out, and I'm sure she would love any new followers!


You're welcome.

Bulletin Board Redo

I have this Bulletin Board
That came from...who knows where (isn't that how all crap is?)
It was the ugliest bulletin board on the block.
Even the frame was ashamed to be a part of such ugliness...it tried to fall off routinely
But I had a dream...a VISION for what it could be.
and after a "Fix it, or it's getting thrown away" ultimatum by my reasonable husband
THIS is what it became...


Before:
BULLETIN BOARD
Truth be told...this isn't our bulletin board...I didn't take any pictures of it before I redid it...but it looked approximately like this one...minus the fact that ours looked like I pulled it out of a dumpster.
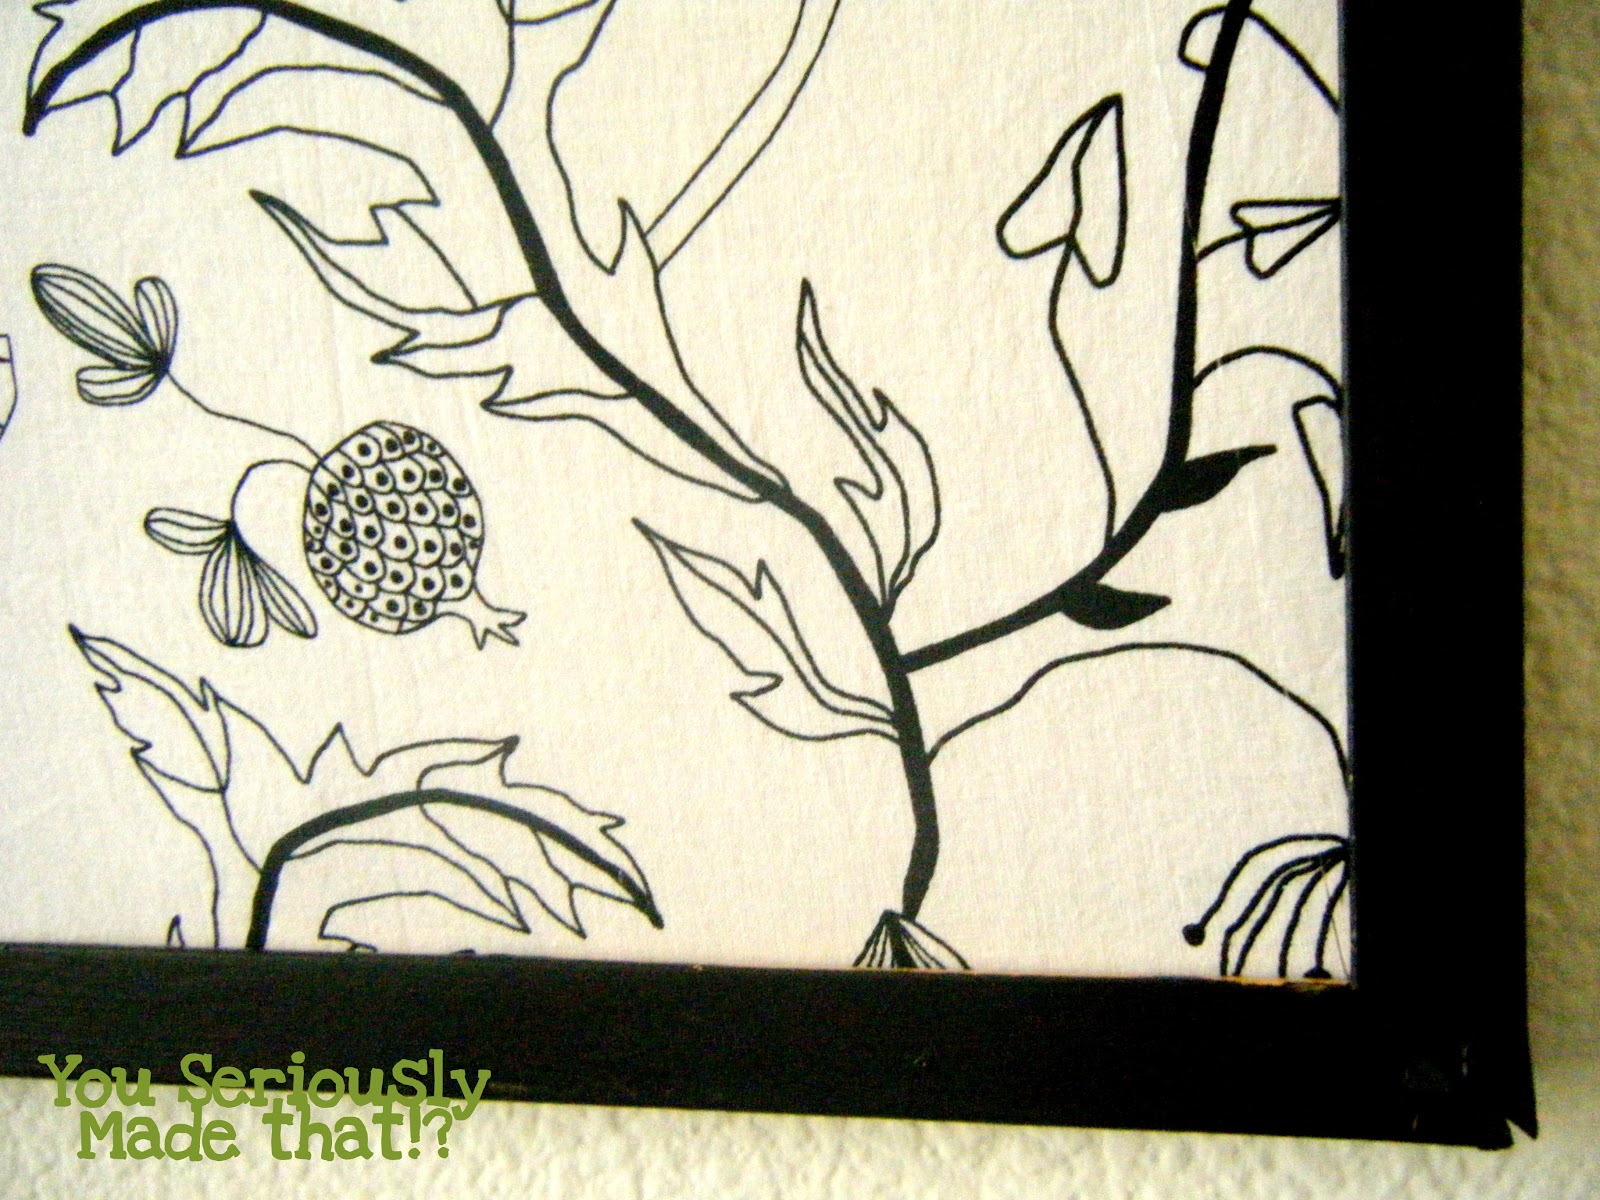
After:

Why no pictures of the redo? ::sighs:: Because I couldn't find my camera, and I didn't want to go looking for it...plus I did this at 2am on our apartment patio...so the light wasn't exactly ideal anyways. Still love how it turned out!

Directions
First I took the frame off the cork board and painted it black
Then I cut a piece of fabric (from IKEA aka Best Store Ever) a little bigger than the actual cork board. 
I flipped it over, and hot glued it onto the cork board (just the back...not the front...I didn't want any lumpy hot glue in the way of push pins!). 
Then I hot glued the frame (piece by piece) directly onto the cork board.

I know what you're thinking: "HOT GLUE? Was she too lazy to use nails?? " I could have put nails into the frame, but believe me...this frame had no hope... I tried to put the tiniest nail you've ever seen in it, and the frame started splitting. I'm telling you...hot glue worked. 

BUT because I used hot glue, I put two big screws through the cork board and straight into the wall...That means no weight on the frame. 

Best part?
This project was 100% free.

And my husband loves it.

Monday, February 21, 2011

The Knotted Headband Tutorial

My husband came home one day
with a headband he had found in a parking lot (I know...sooo sanitary)
and said "I bet you could make one of these"

so I did...because I'm all for stealing awesome ideas.


Difficulty: Medium
Time: 30 minutes
Cost: Under $10
Fun-ness: Why would I do a boring project?

Materials:
Yarn (100% cotton for a crisp look, acrylic for a softer look)
Size H or J hook
Ribbon (approximately 1/2 inch wide)
Hot Glue Gun

Directions

Step 1: Creating the Chains
Crochet 2 separate chains of the same color. One should be approximately 160 chains long (the short one). The other should be approximately 300 chains long (the long one). Fold both chains into thirds, and then fold each chain in half (like a rainbow). Play with the ends until they are about even. 


Step 2: Tying your knot
This is a little hard to explain, so I've made picture directions...


Step 3: Prepping the strands:
Hot glue each of the individual strands to one another in a row. Once they are secure, chop off the uneven ends with scissors, leaving a nice straight end. Do this to the other side as well.


Step 4: Attaching your ribbons
Cut your ribbon into 4 pieces - two 4inch strands, two 15inch strands. Glue one of the 15 inch strands onto the end of your crocheted headband. Wrap the strand with one of the 4 inch pieces, hot gluing as you go; this will give it a finished look. Repeat on the other side. Once done, melt the ribbon ends with a stove burner (or lighter) to keep from fraying. 


And that's it! 

So wear your headband with pride! And when someone asks, tell them you are awesome, and made it yourself!

Love the headband, but don't want to make it yourself? Don't fret, because I'm selling them over at my Etsy Shop